
We’ve started a new training block at OSI, which means a new set of exercises designed to make us stronger by the end of the six week period. I recognized most of the movements but had to ask for help with one in particular, which is the hike pass.
A hike pass is the first part of the kettlebell swing and when doing it, you look a lot like a quarterback hiking a football.
According to OSI Coach Tristan Phillips, “a good hike pass feeds a good swing.” It’s something that we should master if we want to swing kettlebells, but it’s also a “good posterior chain activation drill on its own.” In other words, it’s a great drill to work lats, hamstrings, and glutes while also helping get you in position to swing.
Tristan posted a video detailing the hike pass as well as some common errors to avoid. If you don’t have a coach walking you through the hike pass in person, this is the next best thing. I’ve tried to hit the high points below, but I absolutely recommend watching it.
Hike Pass Setup
Create a triangle with your feet and the kettlebell, the kettlebell being the top of the triangle.
Hinge at the hips, sending them back while keeping your back straight.
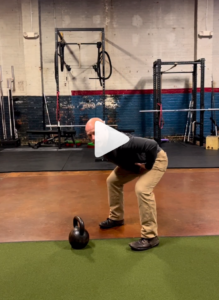
As Tristan points out in the video, the hips are below the shoulders, but just barely. If you end up in a squat position, you’ve gone down too far.
Tilt the bell toward you while driving your shoulders down and back, puffing up your chest.
You’ll want to keep your weight in your heels so that if you were to let go of the kettlebell, you would start to fall backward.
The Hike
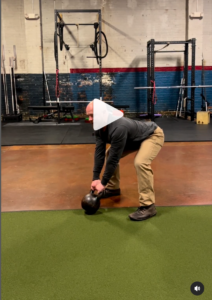
Hike the bell back and up, keeping it as close to the groin as possible.
Return the bell to the floor, keeping your lats engaged.
Things to Avoid
The lats should be engaged the entire time. Avoid letting them relax when the bell goes back down.
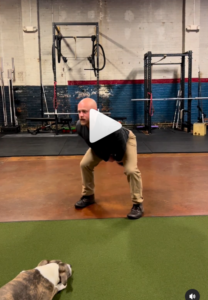
You shouldn’t start to stand up when you’re hiking the bell back. You should maintain that deadlift position the entire time.
Avoid being too gentle when hiking the kettlebell. You’re trying to create force here. Tristan suggests imagining what would happen if you let go of it while hiking it back. If you’re hiking correctly, the kettlebell would fall a few feet behind you, not simply drop to the floor.
Avoid potential injury by starting with the weight that’s right for you. If you have little to no experience, you may want to start with a smaller kettlebell and progress to heavier bells when your strength increases and you feel more confident.
